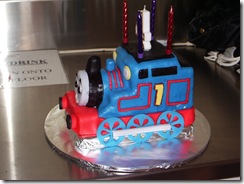
Nana Glen Mum

Lightning McQueen Cake Tutorial – Part 2 – Decorating November 21, 2009

Okay, so if you’ve read Part 1 of the Tutorial here, you have the cake all carved up and ready to cover with fondant.  First of all, you need to cover it in either a layer of buttercream (it doesn’t matter if it is a crusting one or not) or a layer of melted jam to make the fondant stick.  I prefer buttercream because I think you get a smoother finish at the end.  It’s up to your own personal preference though, it’s just to stop the fondant slipping around on the cake or lifting off in places.

Next you want to roll out some red fondant and place it next to the cake so you don’t have to carry it very far (it is most likely to tear while you are lifting it from the bench top to the cake).

Now carefully slide both arms under the fondant and gently lift it up and place it on top of the cake

I usually take off all rings and bracelets before I start rolling out the fondant, but if you haven’t, it’s a good idea to do that now so your jewellery doesn’t dig in to the fondant.  Now with cupped hands, gently press the fondant down following the contours of the cake and then cut off any excess.

If you get any cracks, just rub them gently with warmed fingers, and put a bit of copha/crisco on your hands and rub it in.

Now it’s time for the windscreen.  Roll out some white fondant and cut it like this:

Then gently place it on the cake.  You can make it stick a bit better by lightly brushing a TINY bit of water on the back of the white fondant.

Next up are the facial features – 2 eyes and a mouth from black.  I cut them all out with circle cutters, including the mouth to get a nice rounded smile.

I use a piping tube to cut out the eyes.

Now for the side windows:

and stick ’em on

Now to finish the eyes, out of some blue fondant, cut circles slightly larger than the 2 small black ones.  I just use a larger piping nozzle turned upside down.  Then stick the black circles on top of the blue ones.

and stick them on too

The side markings can pretty much be broken down into a rectancle, a triangle and a curved bit.  I used circle cutters to get smooth edges on the curves, and just do the triangle and rectangle by eye.

The numbers are cut with number cutters and the wheels are cut as a larger black circle with a smaller circle inside cut out and replaced with a red inner circle.  For the logo on the front, I just print out on paper, cut out and put in place with a tiny smidge of water.

All done!  Now it’s your turn.  It’s really not that hard, so have a go.  At the end, if your kitchen is any less of a mess than this:

then I am REALLY impressed!!

Thanks for reading.


Lightning McQueen Cake Tutorial – Part 1 – Carving November 20, 2009

Here is how I made the Lightning McQueen cake for a friend’s son.  I have heaps and heaps of photos for this, so instead of writing notes with each, I’ll just post the photos, but if you have any questions, please let me know and I will answer them and include the information you need in the post.  You need to start with 2 rectangular cakes sandwiched together to give enough height, or if you don’t need to feed as many people, you could start with a loaf cake.

Enjoy!!

So there you have it.  Now you are ready to cover it in fondant.  Here is how I did it.


Thomas the Tank Engine Cake – Part 2 – How I Iced It.

Okay, here we go, the long promised part 2 of the Thomas the Tank Engine Cake Tutorial.  Sorry it took so long, but I hadn’t made another since until 2 weeks ago.  So, without further ado, here it is:

You can check out the previous post for how I carved the cake here.

First up, cover the entire cake with buttercream so that the fondant will stick.  It doesn’t matter if it is a crusting buttercream or not, infact just butter and icing sugar beat together will work just fine.  If you don’t want to go to the trouble, just brush the entire cake thoroughly with melted jam.  It’s basically up to you.  Personally, I find it easier to get a smooth finish on the fondant with buttercream underneath, but at the end of the day, it is just personal preference.

It doesn't have to be neat.

First up are the wheels.  Colour some fondant blue (remember it will darken somewhat overnight), roll it out to about half a centimetre thick and roll out at least 6 circles.  I say at least 6 because you are going to need 6, but I like to do a couple extra just in case I break one, or the kids eat one (also, this way you can pick the best ones).

Next, using small cutters or a knife, cut some bits out to make it look like wheels.  The shape doesn’t matter so much, nor how many you put, it’s just to give the impression.  You could even leave them solid if you like.

You really want to do this part a few days (at least overnight) before hand so they can dry and harden.  Once they are cut out, put them aside on a flat surface to dry.

Next up, cut the scrappy bits off the blue and roll it a bit thinner – I like about 3mm.  Put the cake right next to it so you don’t have to carry the fondant too far.

Now carefully slide both hands and arms under the fondant, lift it up gently and drape it over the cake.  It doesn’t have to come right to the front because that is going to be a different colour anyway.

Now carefully using your hands (take off all rings and bracelets first), press the fondant down over the cake, easing it into the crevices and over the bumpy bits.

You’ll have to manipulate it a bit around the corners.

Now y0u need to trim the front edge.  Using a sharp, smooth blade knife (NOT SERRATED!!!), cut across the front pretty much in line with the edge of the round bit, but just a bit back from it (about half a cm).

Now you need to peel off the extra bit at the front that you don’t want.  I don’t usually keep this bit as it has buttercream on it and can’t be rerolled.

And from the side:

Next you need to colour and roll your red fondant, and cut one edge straight with a ruler.

Place this across the front, slightly overlapping the blue and smooth down.

Now with your sharp, smooth bladed knife, trim across the front to the edge of the blue and peel away the excess.

Now trim across the bottom to give an even bottom edge, and cut a wide strip long enough to wrap around the other 3 sides of the cake.

Now wrap it around the base of the cake and trim the ends and bottom edge.

Now cut 3 thin strips and place them across the rounded bit at the front (sorry about the lack of technical train terminology!!)

Next cut out 2 number 1s.  I used a proper cutter for this, but you could easily do it with a knife.  Then wrap another thin red strip around each.

Now stick them one on each side.

All you need to do now is put a face on.  I made a mould from a toy and cut out eyes and a mouth.
Hope this helps.


Thomas the Tank Engine Cake Tutorial – Part 1- How I did it. April 20, 2009

Thomas the Tank Engine (2)

Well, here I go.  Miss M turned 4 at the start of the month, and like any unconventional little girl, opted out of fairies and princesses for her birthday cake and insisted on Thomas the Tank Engine.   No great surprise since she lives, eats and breathes Thomas.  I have to buy her underwear in the boys’ section because sh

e insists on Thomas undies like her friends (boys) at preschool.  She wears Thomas pyjamas to bed and Thomas t-shirts to preschool.  Everyday she plays with her Thomas train track (talk about value for money mind you!!) and so on it goes, I’m sure you are getting the picture!  The surprise for me though came when she SAID NO TO CHOCOLATE CAKE!!!! and insisted on CARROT CAKE! I kid you not!  You could have knocked me down with a feather!  Anyway, here is how I went about it…

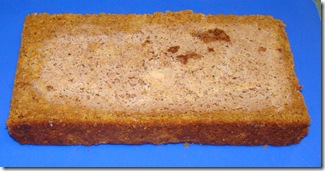
I had read that it is easier to carve your cake if you freeze it first.  I’m guessing it depends on the type of cake.  The carrot cake turned out hard as a rock (and I have very sharp knives) and was very difficult to cut.  My suggestion would be to cut the cake and then freeze it before icing to stop crumbs getting into the cake.  I’ll try that one myself next cake and let you know how it goes.  I have to make a Lightning McQueen this week for Miss M’s friend.

I baked the cake in a square slab pan and cut it into two equal rectangles.  I contemplated baking it in 2 loaf tins but decided against it as loaf tins tend to have sloping sides.  I then put one half to the side for later.Step 1 Top

Step 1

With the half I was working with, I cut it in half laterally to make it lower ie cut

the top half off the bottom half so it looked like this:

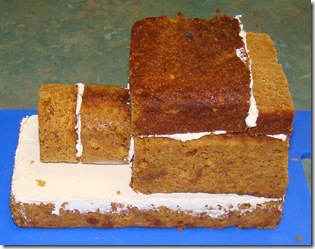
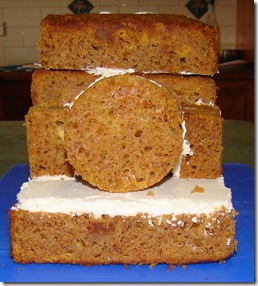
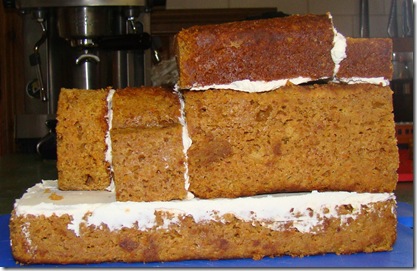
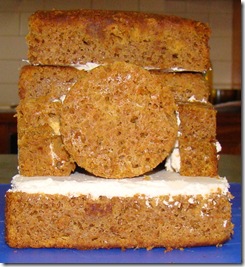
After that, I just pretty much broke Thomas down into a series of squares and a circle at the front at stuck them all together with buttercream.  Here comes a photo series of what I did.  I tried to get a couple of pictures of each stage from various angles.  Hope it’s not too boring or repetitive.

Step 2

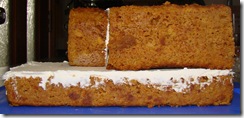
From the half I had put to the side, I cut it in half lengthways ie front to back and placed on half on top, aligned at the back.

Step 2 Top Step 2 Side

Step 3

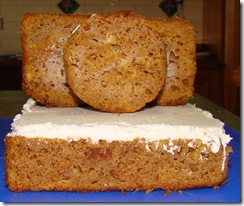
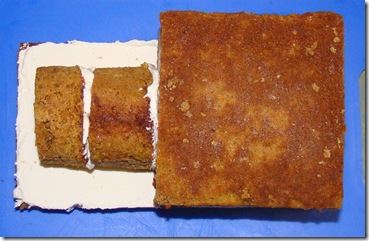
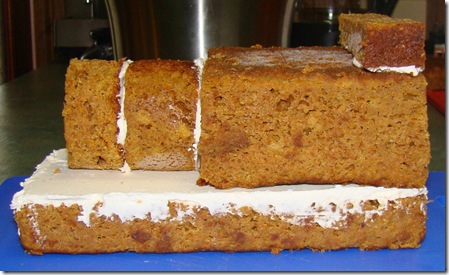
Using a circle cutter, I cut a round and placed it in front of the piece from Step 2.

Step 3 Top Step 3 Front Step 3 Side

Step 4

Using a circle cutter, I cut a second round and placed it in front of the piece from Step 3.

Step 4 Top Step 4 Angle Step 4 Front Step 4 Side

Step 5

From lower cake half, I cut a strip and placed it on top of the large block, again aligned at the back.

Step 5 Top Step 5 Angle Step 5 Front Step 5 Side

Step 6

From the higher remains, I cut another block, but lowered it slightly and placed it in front of the piece from Step 5.

Step 6 Top Step 6 Angle Step 6 Front Step 6 Side

Step 7

I put small squares beside the first round.

Step 7 Top Step 7 Angle Step 7 Front Step 7 Side

Step 8

I cut 2 1/4 circles and placed them in front of the squares from Step 7.

Guess what…all done!  Not to hard at all eh?  Now it’s your turn – be sure to send me photos!

Step 8 Top Step 8 Angle Step 8 Front Step 8 Side

I didn’t take photos of how I iced the cake.  As we live out in the country, I can’t buy fondant so I have had to make my Thomas the Tank Engine own.  I found an excellent recipe at Gingerbread House Heaven.  I used their Professional fondant recipe and had great results even though our relative humidity was excessive – we were actually flooded in for 3 days while I made the cake!  Luckily the water dropped and the roads opened in time for the party!  I did the blue first and worked my way forwards.  I made the wheels a few days earlier and dried them out completely so they were nice and hard, and then just stuck them on with a bit of left over buttercream.  I sat the entire cake on a foil lined biscuit tin lid to raise it slightly off thecake board so that the wheels looked about the right level.  As for the face, I had read another great tutorial over at Thomas the Tank Engine Tutorial

Technorati Tags:

and was going Thomas the Tank Engine (3) to try and sculpt the face myself, but wimped out because my sculpting skills are very very ordinary!  I got some oven bake polymer clay and made an imprint with one of Miss M’s toys.  She has a puzzle that has plastic pieces that make a front on view of Thomas.  I took the face piece, pushed it into the clay and baked the clay to make it hard.  When I was ready to make the face, I coloured it grey, then pushed Thomas the Tank Engine (4) a big piece over the mould and rolled it slightly with a rolling pin for even pressure.  When I pulled the fondant off the clay, I had a wonderful 3 dimensional face!  I used a round cutter (the same one I used for the circle pieces of cake so they were a perfect fit) to cut the face out, and then just added in the coloured details.  It actually turned out to be quite a simple exercise once I broke it all down.

So now you know how to cut up the cake and put it back together again, you’ll be ready to ice it.  Here is how I covered the cake in Part 2 of the tutorial.

Anyway, I hope you have found this helpful, and if you actually know what you are doing, I would love to hear about how I can improve my cake decorating – especially getting my fondant nice and even – it always has lots of lumps and bumps.