Excel 2007 introduced the new interface called the Ribbon. It’s a cross between a toolbar and a menu. It also has a Quick Access Toolbar (QAT) that many people don’t seem to be using.
The QAT is the small toolbar above the Ribbon to the right of the round Office button in Excel 2007 or to the right of the Excel log in the Excel 2010. When Excel is initially installed it only has the Save and Undo and Redo icons on it. See images below. You can customize this Toolbar – see instructions later in the post.
Minimizing the Ribbon
Some people hate the Ribbon with a passion and hide it because it takes up too much screen real estate. To Minimize the Ribbon hold the Ctrl key and press F1. Repeat to Maximize it. You can also right click the Ribbon and select Minimize the Ribbon. In Excel 2010 there is also a new small icon to the left of the help option in the top right of the screen that Minimizes and Maximizes the Ribbon, see image below.
The QAT is still visible when the Ribbon is Minimized. To access the Ribbon icons when it is Minimized, click one of the Ribbon tabs to view that tab and select an icon. The Ribbon will Minimize again once you have used it.
Check out this video that takes you through the steps mentioned in this post.
Customize the Quick Access Toolbar (QAT)
You can customize the QAT, and it’s really easy to do. You can click the drop down icon on the end of the QAT to select from a list of common icons. You can also right click any icon on the Ribbon and select Add to Quick Access Toolbar.
The icons you put on the QAT will depend on how you use Excel and how you use the Ribbon. If you have the Home Ribbon visible most of the time, which most people do, then you can go to the other Ribbons and chose the icons that you use most and add them to the QAT. That way you rarely have to go to the other Ribbons.
If you use Excel with the Ribbon Minimized you will probably add more icons from the Home Ribbon to your QAT.
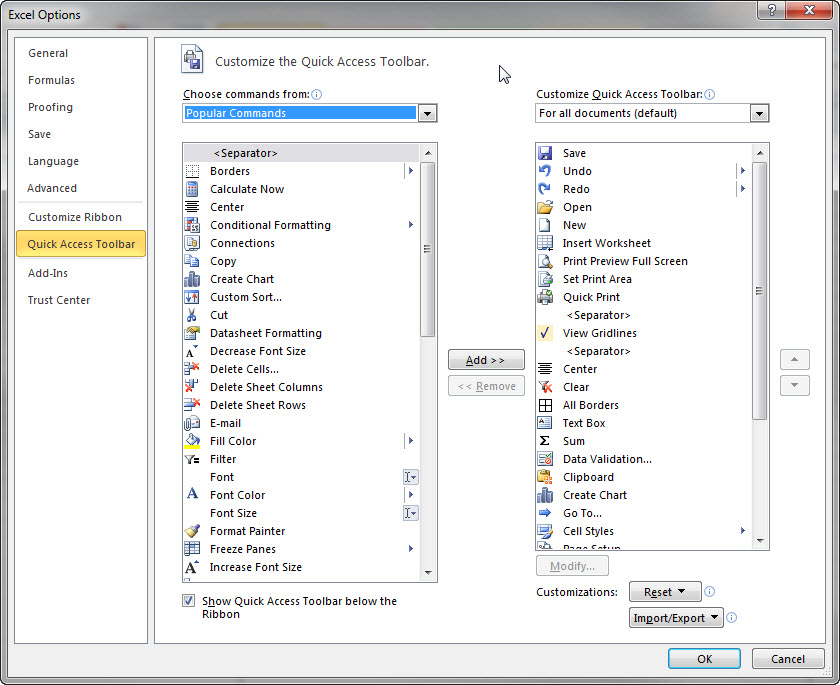
There are more icons available to add to the QAT than are in the Ribbon. To see them, right click the QAT and select Customize Quick Access Toolbar. Click the image below to view it.
Click the Choose commands from drop down and select either All Commands or Commands Not in the Ribbon to see more options.
Simply double click the command you want. This adds it to the list on the right. Then use the up and down arrows on the right of the dialog to move the icon on the QAT. Make sure you click OK to keep the changes.
At the very top of each list of icons there is a <Separator> icon. This adds a vertical line to the QAT. You can use this to set up sections on your QAT. Eg you could put all your formatting icons together.
Below the Ribbon
The QAT can also be displayed above or below the Ribbon. Right click the QAT and select the option you want. I always have my QAT below the Ribbon because it’s easier and quicker to select.
Keyboard Shortcuts
Check out this post that includes Alt key shortcuts for the icons on the QAT.


Please note: I reserve the right to delete comments that are offensive or off-topic.